Field Test HIKMICRO Lynx LH19 2.0: What You Need to Know!

Field Test: Thermal Imaging Camera Lynx LH19 2.0 + A1 + Sony 400 mm f/2.8 GM OSS
Note:
The field report is optimized for viewing on laptops and PCs. Due to its length and the number of photos, it is less suitable for smartphones.
Key Data
- Model: HIKMICRO Lynx LH19 2.0
- Field of Use: Forests, landscapes, nighttime observations
- Application: Mobile & stationary (hide/blind)
- Purpose: Detecting animals & targeted photography
- Test period: Winter months into spring under various conditions
- Special observations: Pygmy Owl, Sparrowhawk, Fox, Starling flock
Table of Contents
- Why use a thermal imaging camera for wildlife photography?
- Overview of the tested model
- Test conditions & methodology
- Observed animal species
- Practical use in the field
- Handling & ergonomics
- Image quality & performance
- Performance under different temperature conditions
- Strengths & limitations
- Best use cases and complementary equipment
- Seasonal differences & impact on image quality
- Conclusion & recommendation
- Expectations vs. reality
- Alternatives
- FAQ
Why Use a Thermal Imaging Camera for Wildlife Photography?
A few months ago, I decided to buy a thermal imaging camera. I had been considering this step for about a year. My motivation was the idea of spotting animals more easily – and at the same time enhancing my wildlife experience.
In short: making the hidden visible.
Once I had made the decision to get this piece of equipment, I first needed to learn the basics of the technology in order to make a sound purchase decision.
In the end, the performance described in my online research convinced me to go for the HIKMICRO Lynx LH19 2.0. It is considered an entry-level thermal camera. I cannot say whether it is better or worse than competitors’ models – since I have no experience with other thermal cameras. But I can share how this technology supports me – and where I see its limits.
Thermal imaging cameras are mostly used by hunters. The animals they look for are usually larger than songbirds.
So, the target group for these devices – as well as much of their design and functionality – is clearly in the hunting sector. That’s why I wasn’t sure at first whether such a camera would really be worth it for my purposes. And since I didn’t want to invest a large budget, I had to ask myself whether entry-level models are suitable at all.
Overview of the Tested Model: HIKMICRO Lynx LH19 2.0

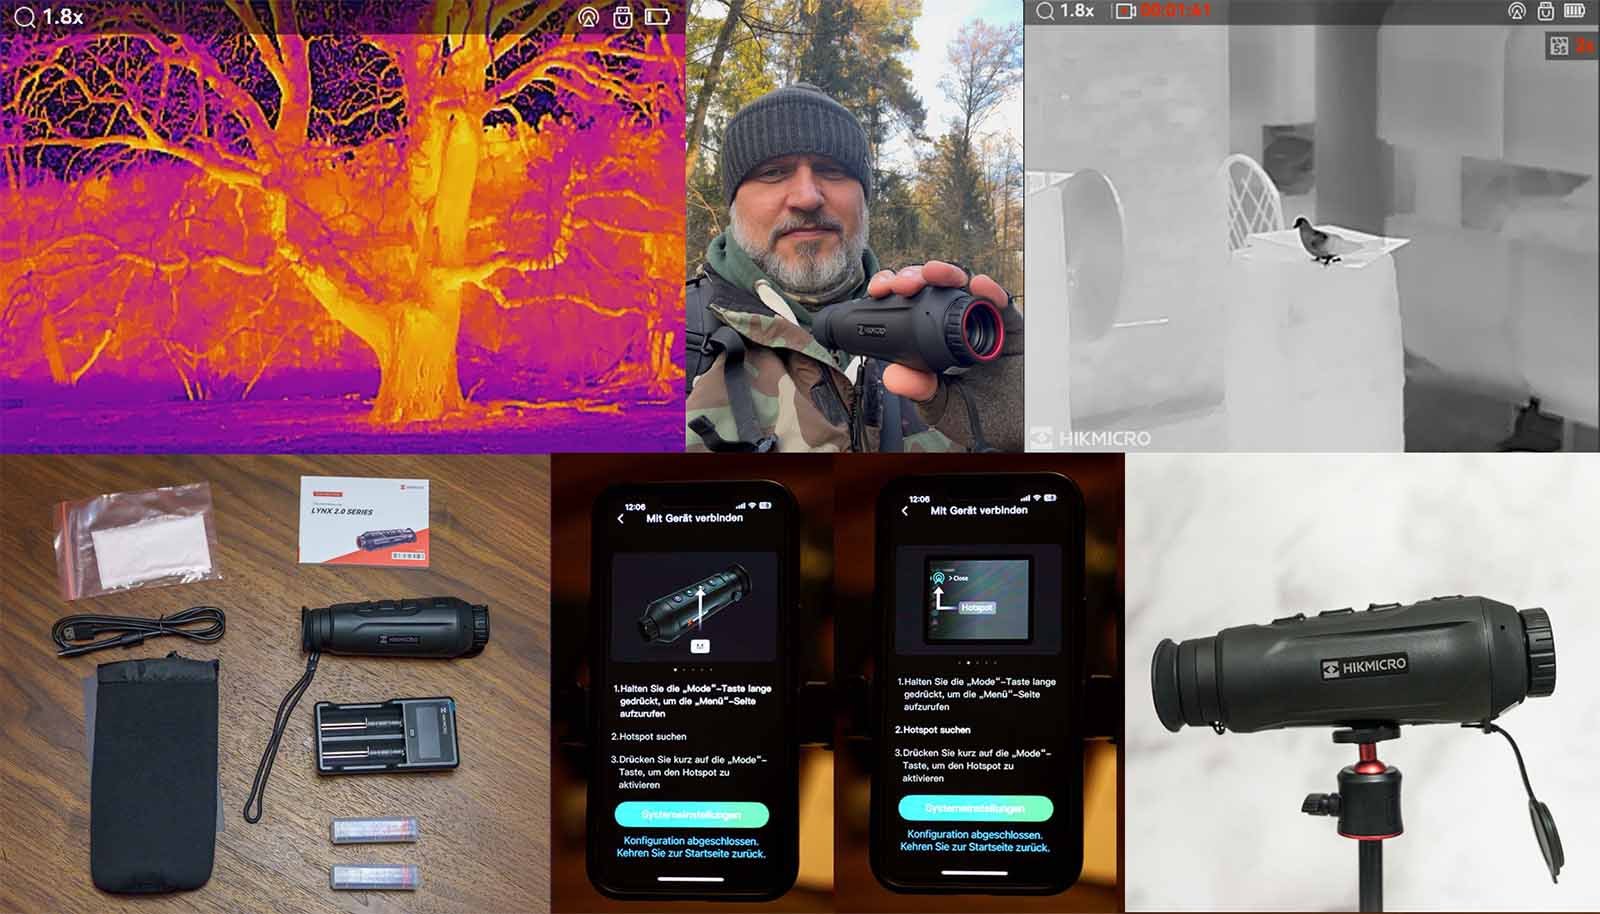
Hikmicro Lynx LH19 2.0 Thermal Imaging Camera
The Lynx LH19 2.0 thermal imaging camera is an entry-level model by HIKMICRO. Based on my research, what convinced me most was its strong price-performance ratio.
Technical Specifications (manufacturer information) – HIKMICRO LYNX LH19 2.0
- Sensor: 384 × 288 px
- Viewfinder (display): 1024 × 768 px
- Frame rate: 50 Hz
- Focal length: 19 mm (equivalent to a field of view of approx. 150 mm on full frame)
- NETD: < 20 mK
- Aperture: F1.0
- Detection range: 900 m
- Base magnification: 1.8× (equivalent to a field of view of approx. 150 mm on full frame)
- Digital zoom: 1×, 2×, 4×, 8×
- Thermal display modes: White Hot, Black Hot, Fusion, Red Hot
- Diopter adjustment: Yes
- Rangefinder: Yes
- Photo capture: Yes
- Video recording: Yes
- Wi-Fi / App support: Yes
- Battery life: 6.5 hours
- Battery type: Internal Li-Ion battery
- Internal storage: 16 GB
- Interfaces: USB-C
- Protection rating: IP67
- Weight: 282 g (without battery)
- Dimensions: 172.5 × 56 × 60.8 mm
You can find more details about the technical data in my first article “Thermal Imaging Cameras and Wildlife Photography?”.
Test Conditions & Methodology
For my first field test, I explored different natural environments – in the forest, in open landscapes, with and without lakes, both at night and during the day.
I used the thermal camera in two different ways:
- Handheld, as hunters typically do.
- Mounted, fixed above my camera with lens, which was my original idea.
In addition, I tested live transmission of the thermal image to both a smartphone and a tablet in outdoor use. My goal was to find out whether I could make hidden wildlife visible – and whether this would give me an advantage in wildlife photography. For example, to know which animals are in front of me while I am in a hide, even if I cannot see them with the naked eye.
But also for location scouting – analyzing new, unfamiliar environments to better assess the habitat and plan my photography projects more effectively.
Observed Animal Species
This test report covers both animals I spotted by chance and those I was able to deliberately photograph after detecting them. There were some surprises. I observed a wide variety of songbirds and mammals – and one of my highlights was successfully photographing a Pygmy Owl.
The Pygmy Owl During Courtship

Ein Highlight: Die Sichtung eines paarenden Sperlingskauzes im Morgengrauen. Ohne Wärmebildkamera: keine Chance.
Pygmy Owls mating at dawn – without a thermal imaging camera, there would have been no chance. The video was recorded with the Lynx LH19 2.0 and later processed in Video AI to create a slow-motion sequence and slightly enhance the resolution.

In the video above, the mating act could be observed very clearly thanks to the slow-motion sequence. The camera also captured this moment; however, since it was still very dark, even with an aperture of f/2.8 there was not enough light. The exposure time was 1/20 s at f/2.8 and 400 mm – so while the mating of the Pygmy Owls is recorded in the image, it is naturally hardly visible.
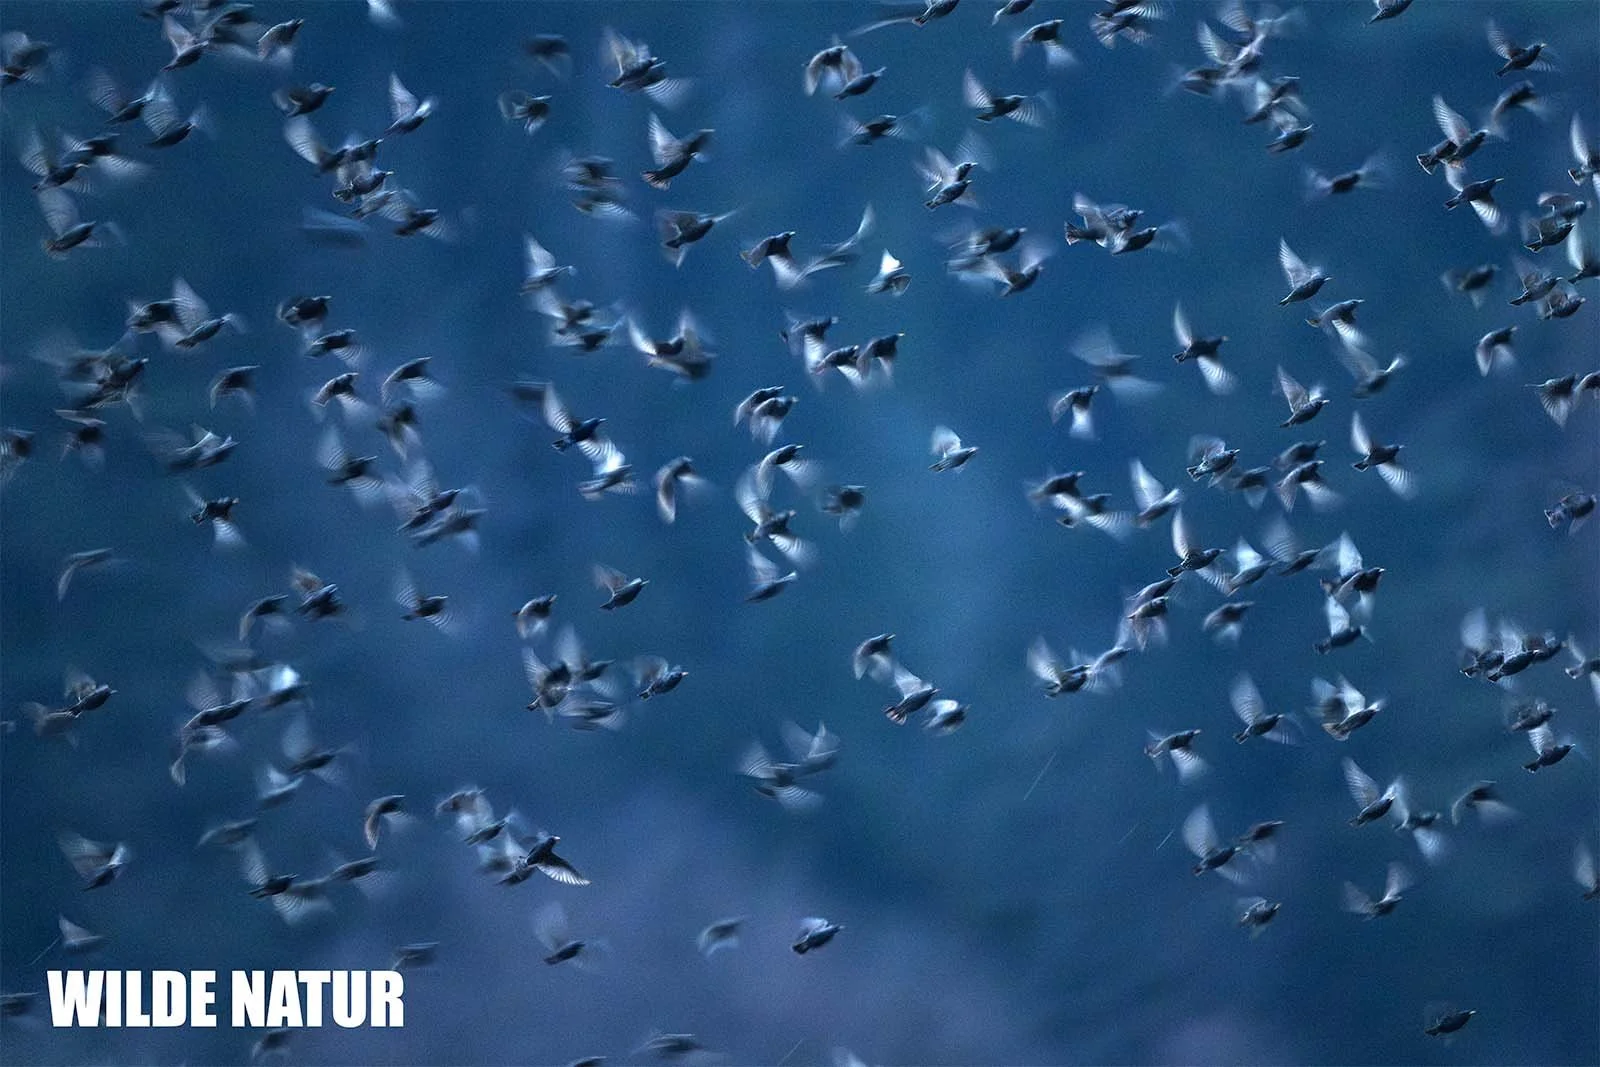
Starlings Awakening and Hidden Predators
Starlings in the reeds provided a perfect test scenario for the thermal imaging camera.
An interesting aspect is that, at first, no heat signature at all can be detected in the reeds; only when they prepare to take off and perch higher up in the reeds do they become visible.
The reeds completely block their heat signature.
Starlings take off from their roost in the reeds before sunrise. The footage was recorded with the Lynx LH19 2.0 and processed in Video AI to create a slow-motion sequence. At the end of the video, different thermal imaging views are shown.


The Phantom of the Forest, Unmasked

Thermal image in White Hot mode: the Sparrowhawk appears as a bright shape on a large branch. 1.8× zoom view, which is the base setting of the Lynx.

Thermal image in White Hot mode: Sparrowhawk at 3.6× digital zoom.
One sunny morning, while scouting a new location, I was able to spot a pair of sparrowhawks sunbathing and building their nest.
Up to that point, I had only encountered this shy bird twice: once when an osprey attacked the "phantom of the forest" because it had come too close to its nest, and another time at a great distance, when it was perched in a tree and I detected it with the thermal camera.
This time I was a bit luckier: by deliberately scanning the surroundings with the thermal imaging camera, I managed to track down the hidden birds at close range.


On Silent Paws
While waiting in the forest for the pygmy owl, a fox quietly made its way along the path and passed through my field of view.
In the thermal image (first picture – green marker) it was somewhat visible, but at that distance it was not possible to clearly tell whether it was a fox or another mammal.
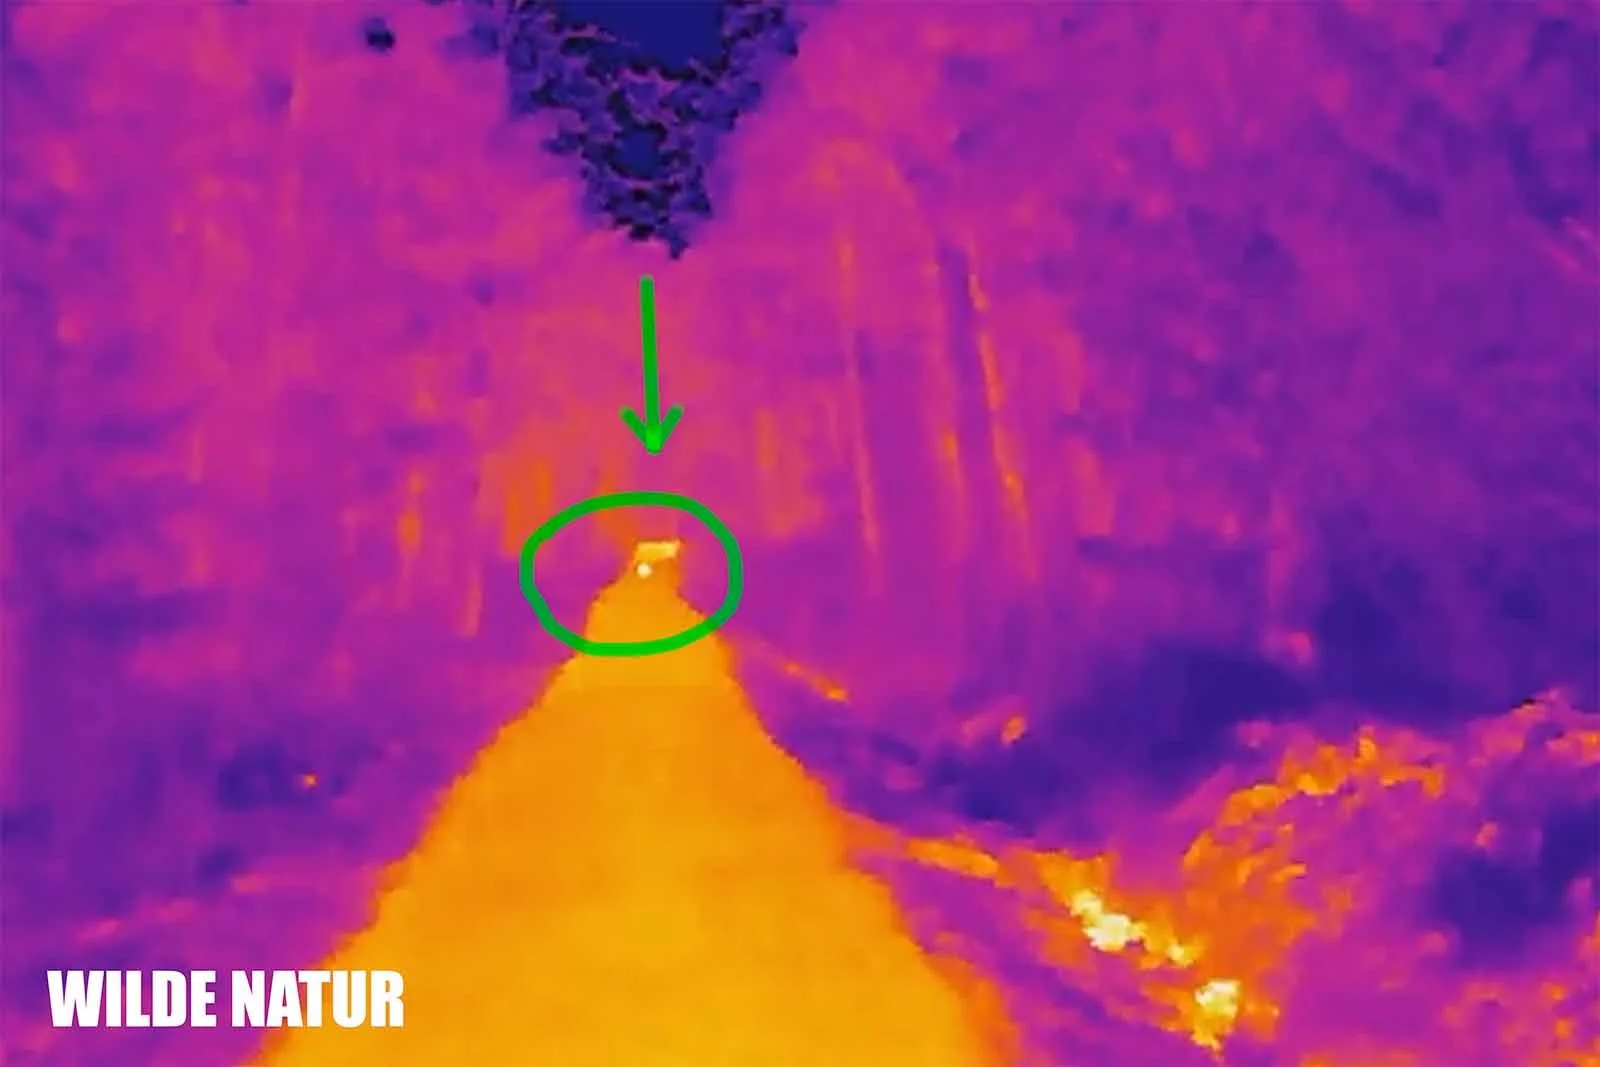
Fusion thermal view: a fox appears as a bright spot on a forest path, highlighted with a green marker.
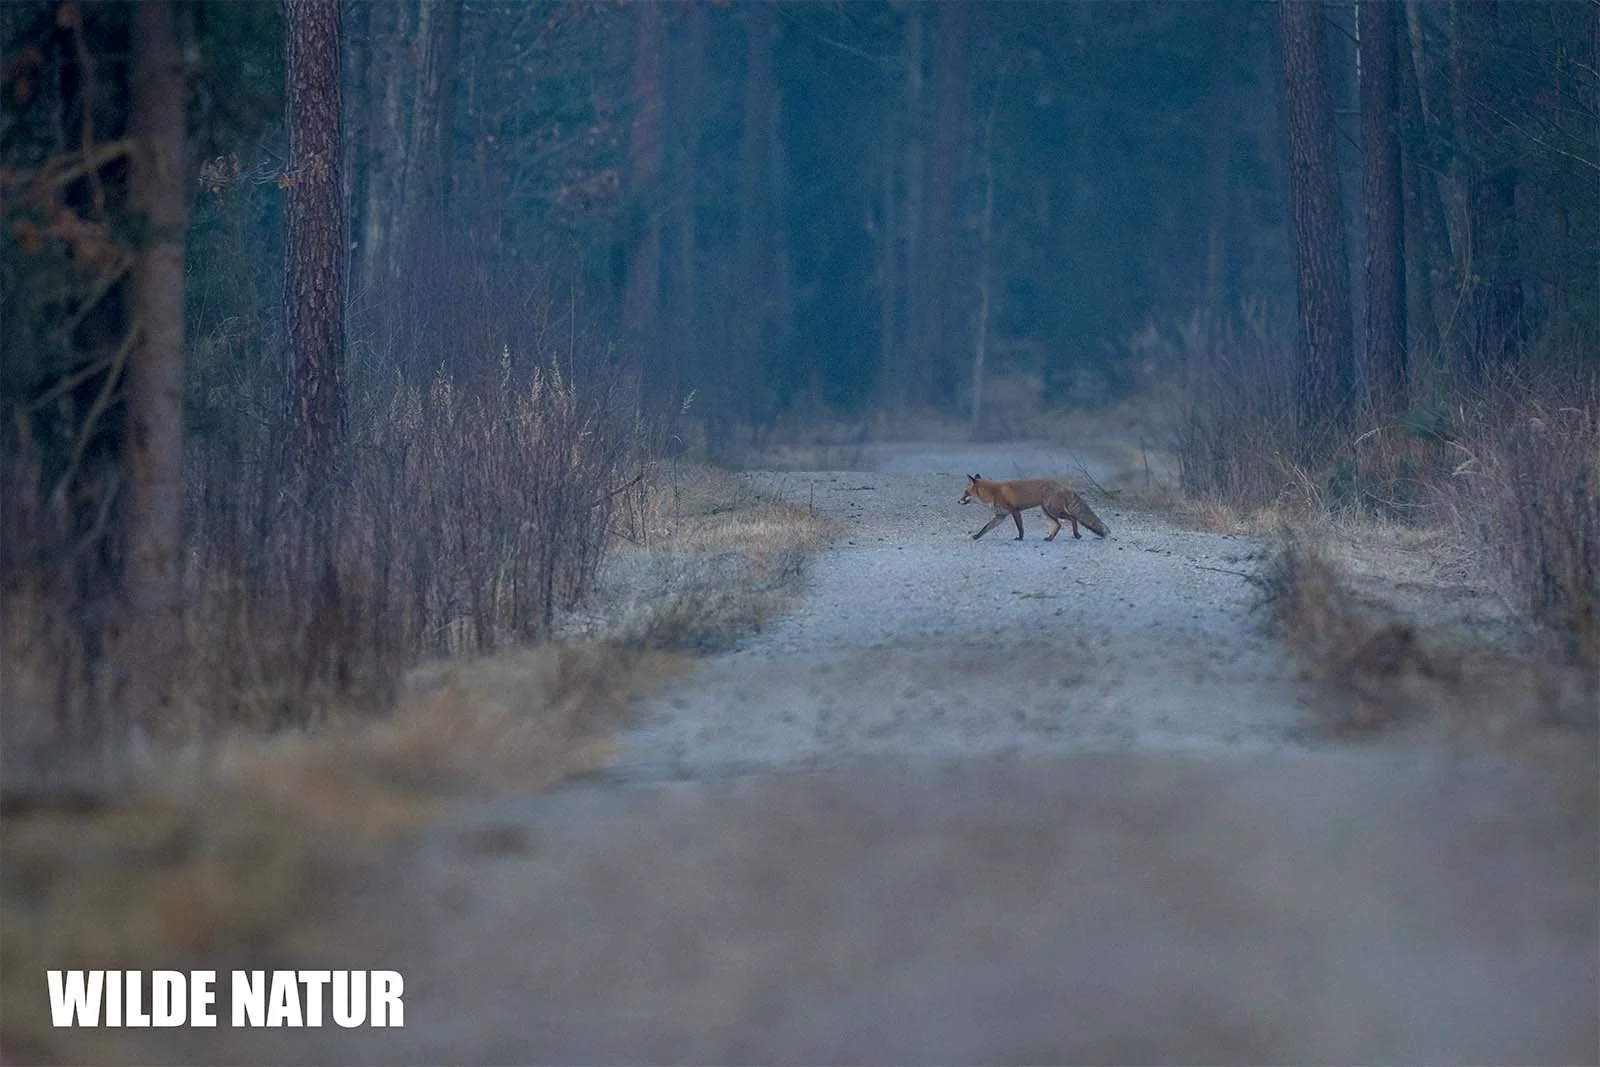
The same fox from the thermal view, photographed with a Sony A1 + 400 mm f/2.8.
Practical Use in the Field
As mentioned earlier, I initially used the thermal imaging camera in a mobile way. However, my actual goal was to combine it with my photography equipment – so that I could a) make full use of both devices at the same time, and b) have my camera gear already aligned with the subject and ready to shoot right after spotting it with the thermal camera.
Another advantage: I wanted to keep both hands free to stay flexible. The thermal camera has a tripod mount – a standard screw thread like on regular cameras. I made use of this option and came up with the idea of combining my camera and the thermal imaging device.
This created an all-in-one solution, because in wildlife photography more equipment always means more effort – whether in setup or handling. This is especially challenging at night, not to mention the extra weight you have to carry. So I started thinking about how to find a practical way to combine everything in one setup. At first, I tried using the gear I already had. That brought me closer to a partial solution, but to finalize the setup I had to get a few additional components.
The Result of My Setup:

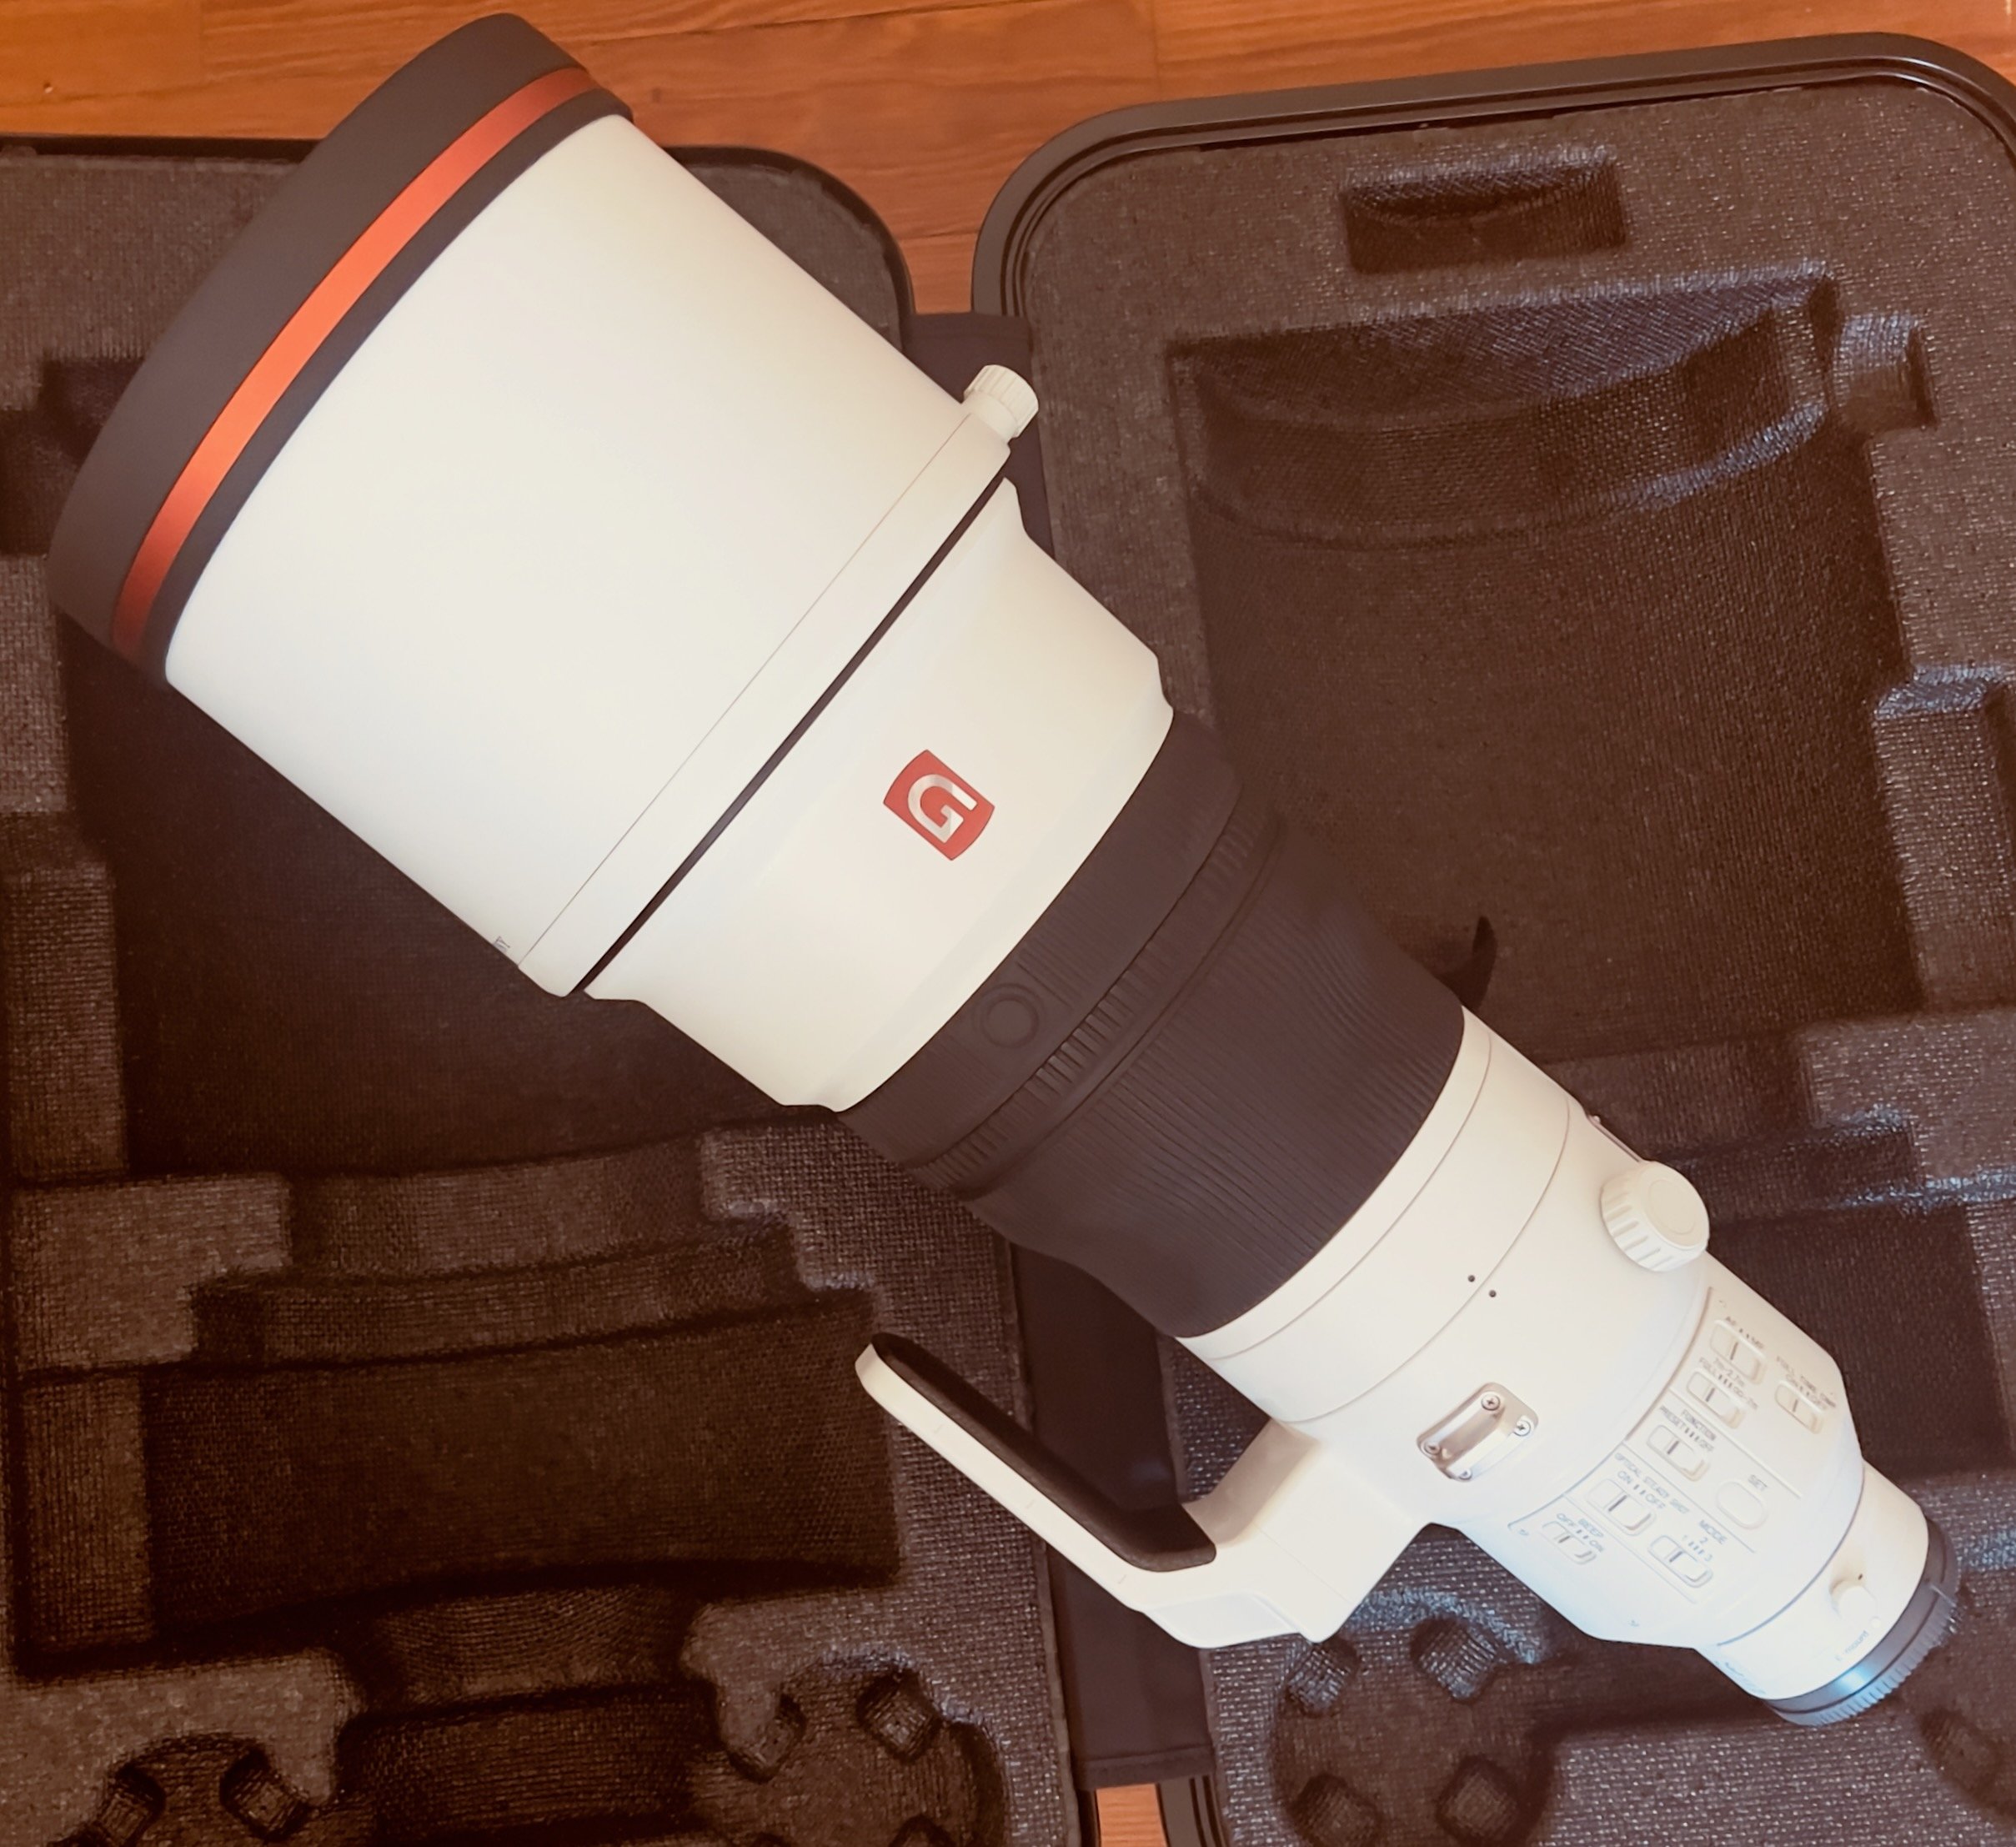
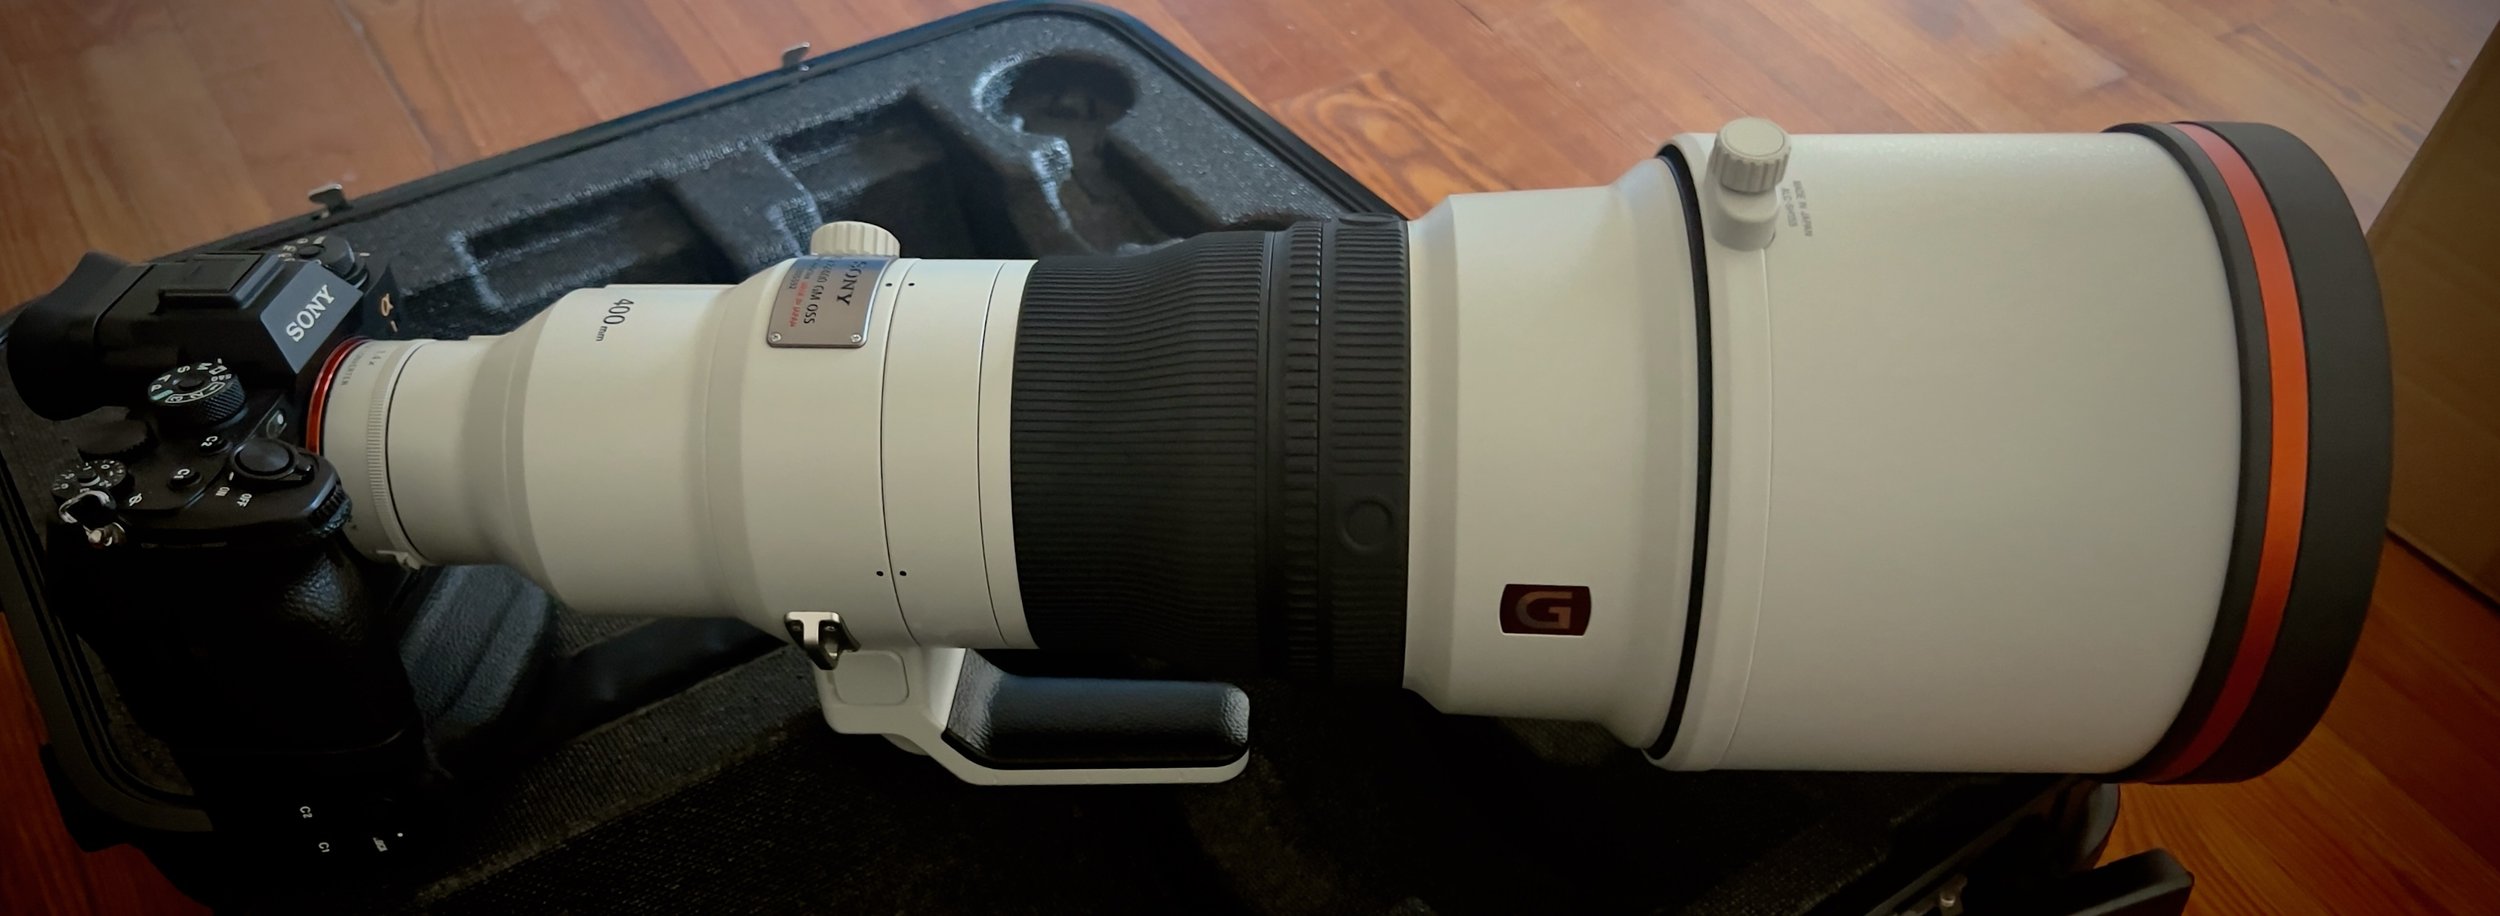
Sony A1 + Sony 400 mm f/2.8 + Lynx LH19 2.0 with hot shoe mount.


Operable with one hand: Lynx LH19 2.0 thermal imaging camera with a compact build.
The thermal imaging camera is relatively compact (172.5 × 56 × 60.8 mm) and weighs around 300 g. If necessary, it can even fit into a jacket pocket. For me personally, it feels handy and is easy to operate.
All essential functions – menu navigation, zoom, photo and video recording, as well as switching between different thermal views – can conveniently be controlled with one hand. This is, of course, a subjective impression. I have large hands, so the camera fits me well and I can reach all the controls without issues. If you’re unsure about this, it’s better to buy such a device from a local dealer rather than online. That way, you can judge more easily whether the ergonomics truly suit you.
Display and Readability in the Viewfinder
The viewfinder provides good resolution (1024 × 768 px), which makes it possible to identify objects more or less clearly depending on their distance. It should be noted, however, that the resolution of the viewfinder is higher than that of the sensor (384 × 288 px) in the thermal camera. This means that video or photo recordings don’t look quite as good on a PC monitor as they did through the viewfinder. The menu layout and navigation are also clear and well designed, making them almost self-explanatory. A few icons are not immediately intuitive, but these can easily be checked in the manual.
Battery Life & Power Consumption
The manufacturer specifies a battery life of 6.5 hours – and in my experience, that holds true. However, the actual runtime strongly depends on how the device is used:
- With mobile use – when moving around and only scanning the surroundings occasionally – the battery lasts for at least 6 hours.
- With continuous live streaming, the runtime is about 3 to 4 hours.

Wireless live transmission to a tablet (cable connected to power bank).
One particularly interesting test I carried out on a cold winter morning at -5 °C: I spent some hours outside while the thermal camera was running continuously. Despite the low temperatures, the battery lasted for almost 4 hours, and by the end it was not completely drained. It might have lasted another 30 minutes — but that’s just an assumption. From my perspective, the manufacturer’s specifications are not exaggerated; they match my real-world experience.

Hikmicro LH19 2.0 thermal imaging camera with open battery compartment and inserted battery.
Battery replacement is relatively easy: the side-mounted battery compartment is conveniently placed. The only minor drawback is the battery cover, which can be a bit tricky to close – I see this as a downside, but not a dealbreaker. The package includes two batteries, allowing the camera to run continuously for between 8 and 12 hours, depending on usage and outside temperature.
For a daily one-hour walk, a single full charge lasts for many days without having to worry about recharging.
Image Quality & Performance
Detection Range & Precision
As already mentioned, thermal imaging cameras are mostly used in hunting, and their design reflects that. This means the field of view is more in the telephoto range – ideal for observing and identifying mammals at medium to long distances. Since I use the camera for wildlife photography, I deliberately chose a more “wide-angle” model. That doesn’t mean I actually get a wide-angle view. As described earlier, with this model I get a field of view equivalent to a full-frame camera at 150 mm.
Real-World Experience
In practice, however, I sometimes wished the focal length were a bit wider – especially when trying to cover a full surroundings radius of about 10 meters. Unfortunately, within this price and performance range there was no model with a wider field of view without major trade-offs (such as lack of focusing or reduced functions). That was the situation when I was looking for a thermal camera, though this may change in the future.
For my purposes, the HIKMICRO Lynx LH19 2.0 is well-suited, particularly in the medium viewing range of around 200 m. That doesn’t mean you can’t detect animals at greater distances – but the strength clearly lies in mid-range distances. The Lynx LH19 is officially specified by the manufacturer with a detection range of 900 m. I can confirm this, though identifying the exact species at that range is already difficult.
Handling in Close and Long Range

Graphic showing the field of view of the Lynx 19 2.0.
Minimum Focusing Distance (up to approx. 2 m)
At close range, you need to actively work with the camera by scanning the foreground systematically – ideally in quadrants, meaning in different directions step by step. The minimum focusing distance of the device is around 2 m.
Long Range
At medium to long distances, the movements of small to medium-sized animals can be detected, but it becomes harder to identify them precisely by species. You can usually tell whether it’s a songbird or a mammal – but not exactly which one. For mammals, it’s somewhat easier since they are generally larger. Still, at greater distances it can be difficult to determine whether it’s a fox or deer crossing the forest path. But this is exactly how the manufacturer describes it – so the camera does live up to its promise.
Thermal Imaging Display & Training the Eye
One thing I had to learn was how to interpret the thermal view. It takes some practice for the eye to understand how heat sources are represented – and what differences exist between the various display modes.
An Example:
Songbirds are difficult to detect because of their small size – especially when other heat sources in the surroundings visually “overlay” them, such as vegetation. Over time, however, I found two thermal imaging modes particularly helpful:
- Fusion
- Black Hot
With these modes, I can spot smaller animals most effectively, since they stand out more clearly from their environment.
In the gallery below showing the different thermal imaging views, you might get the impression that the “Red Hot” mode is the best option. This may be true for larger objects, but with small birds at some distance, they do not emit enough heat to appear as a solid red area.
In the following gallery, I show all four thermal imaging display modes of the camera. The scene is the same in each case: a person standing on a forest path, representing the warmest point in the frame.


Resolution & Level of Detail
The resolution and detail level of a thermal imaging camera cannot be compared with that of a conventional photo camera. Image quality is relatively low in comparison, which means this type of device is not directly suitable for high-quality photo or video recordings. Anyone who wants to capture thermal images in high resolution would need to invest in a high-end model.
Originally, I didn’t plan to take photos or videos with the camera – for me, it was meant purely as a tool for wildlife observation. However, after several weeks of use, I must say the idea of deliberately creating thermal images is quite appealing. It opens up a completely new perspective on nature and allows for fascinating captures with their very own aesthetic.
For this purpose, however, the HIKMICRO LYNX LH19 2.0 is only suitable to a limited extent, since its resolution is too low. The viewfinder image is displayed at a much higher resolution than the recordings that are actually saved. This is because the viewfinder itself has a higher resolution, while the recordings are limited to the lower resolution of the sensor.
- Sensor: 384 × 288
- Viewfinder (Display): 1024 × 768 px
In field use, this doesn’t bother me much – even though I sometimes wish for higher resolution when reviewing the material later on a laptop.
Performance Under Different Temperature Conditions
At this point, I cannot provide a full assessment, since I have mainly tested the camera at lower temperatures.
Strengths & Limitations
Specific Advantages for Wildlife Photography
I cannot yet draw a final conclusion – I’ve set myself at least 12 months to gain a solid assessment under different conditions (habitats, seasons, etc.).
What I can already say is this: my decision to buy a thermal imaging camera has been absolutely worthwhile. The excitement of getting out into the field even earlier has only grown – because now I can observe things that had been completely hidden before.
During my field use so far, I’ve witnessed events I would never have imagined.
One concrete example: While waiting to photograph a pygmy owl, the thermal camera was an enormous help – both in scouting the location and later during the actual shoot. Without it, I would not have been able to capture the images or witness the owls’ mating. That was a truly special experience.
Potential Weaknesses & Challenges
So far, I’ve noticed that mobile use – simply walking around with the camera – is of limited value. A targeted use, such as scanning tree cavities in the forest, works well. But for me, the real strength of this tool lies in hide photography, where I can use it to extend my perception of the surroundings. Since the environment in a hide doesn’t change much, the thermal camera is a very helpful tool to detect changes in a constant setting more quickly and interpret them more accurately.
Limitations Due to Field of View
This primarily comes down to focal length and field of view. Ideally, I’d like an optic with a variable field of view – from extreme wide angle up to the current crop of the HIKMICRO LYNX LH19 2.0, which corresponds roughly to a 150 mm focal length on a full-frame camera. While the digital zoom offers up to 8× magnification, the resolution suffers significantly, making it unsuitable for my purposes.
Detecting Birds & Smaller Animals

Thermal image in White Hot mode: a small songbird in the forest, perched on a shrub – highlighted in red.
- Small birds at a distance are – depending on the surroundings and heat sources such as tree trunks – easy to spot when they move, but when they remain still, they often blend into their environment.
- Larger bird species (from blackbird size upwards) are much easier to detect.
- In a hide, it is challenging to locate motionless songbirds at close range, since the eye quickly becomes overwhelmed when scanning with the telephoto-like field of view.
Best Use Cases and Complementary Equipment
Based on my experiences so far, I’ve come to the following conclusions:
Strengths of the Thermal Camera in Hide Photography
When used from a hide, with the camera aimed at a specific area, you can quickly detect movements or changes. This is where I see the clear strength of a thermal imaging camera – when focused on a fixed viewing area.
Limitations in Mobile Use
In mobile use, spotting animals down to the size of a songbird is not a problem – but the question is, what do you want to get out of it? A simple sighting? No problem.
Detecting tree cavities with a certain temperature, which may indicate bird activity? Very useful.
For me personally, mobile use is tiring in the long run, since the surroundings constantly change – and with them the thermal patterns, which makes the eye fatigue more quickly. The device does provide a stable image even when used handheld, but it’s more demanding.
Combination with Photography
If you don’t just want to observe but also photograph, you should consider how to operate both devices in parallel. Anyone experienced in photography knows: to get good results, you can only focus on one thing at a time. That’s why I combined the thermal camera with my photo setup.
This way, I can align both the thermal camera and the photo camera with minimal effort at the same point. Handling becomes easier – without having to pick up both devices separately.
I use the thermal camera like a finder scope – similar to those on telescopes: when I look through the thermal camera and align it, my camera lens moves with it. This means I can immediately switch to the viewfinder of my photo camera after spotting, without wasting time searching for the subject. I usually keep the thermal camera set to video recording, so it documents the entire observation continuously.
Seasonal Differences
One aspect I still need to test fully are the seasonal differences. The open question is whether there are noticeable effects or limitations in detection or in battery life – as already mentioned in relation to temperature differences.
Winter – the Best Conditions?
I suspect winter delivers the best results, because:
- the environment is generally colder
- which makes animal and object heat signatures stand out more clearly
Summer – a Challenge?
In summer, conditions might be less favorable:
- Higher air and ground temperatures may cause less contrast between objects
- Warmer nights may also reduce the thermal contrast between animals and their surroundings
But I will test this further during the summer months.
Use During the Day
During the day, I found the camera especially useful in shaded forest areas. However, interpreting temperature differences requires some practice – particularly with water surfaces.
Daytime use is not always meaningful in every habitat:
Example: In a quarry, I was searching for eagle owls. These birds are very hard to spot with the naked eye – their camouflage makes it a real challenge. With the thermal camera, however, there was another problem: the rock wall itself stored heat and emitted it, making it impossible to clearly distinguish the bird from the background. This doesn’t mean such environments are completely unsuitable, but in my experience a quarry is not an optimal setting for this technology.
Conclusion & Recommendation
Is This Purchase Worth It for Wildlife Photographers?
For me, so far, the investment has absolutely been the right choice. I still need more long-term experience to give a final verdict on its strengths and weaknesses in regular use. Beyond pure observation, the thermal camera has given me a fascinating additional way of experiencing nature. Without exaggeration – it now accompanies me on every outing.
Suitable Use Cases & Target Groups
If you are considering buying a thermal camera, you should ask yourself the same question as when buying a photo camera: “What exactly do I want to do with it?”
The device can be a very good solution for spotting and observation – but with limitations, depending on the model.
Who Is a Thermal Imaging Camera For?
For general wildlife observers:
- A great way to detect animals that are hard to see with the naked eye.
For wildlife photographers in a hide:
- Particularly useful when fixed on one area for constant monitoring
- Best used in combination with a setup that links the photo and thermal cameras (e.g., on a tripod)
For birders (birdwatchers):
- Entry-level models are probably not ideal, as they often lack the detail needed to identify species
- Higher-end models with better resolution may be interesting for ornithologists
For mobile use (stalking, hiking):
- Possible, but depending on workflow, can be impractical
- Using both a thermal camera and a photo camera at the same time can be hectic and cumbersome
For me personally, the greatest strength of the camera lies in hide use or from a fixed location, scanning and observing the surroundings. Combined with my photo setup, I can fully focus on photography.
Expectations vs. Reality
I imagined that with a thermal camera I could simply walk through the landscape, look around, and instantly see where animals were hiding. In reality, it’s not that simple. Of course, much depends on the quality of the device – high-end models will likely deliver faster and better results than an entry-level one. Still, my best results have come from hide use, where changes in the environment are easier to detect.
Alternatives
Anyone wanting to rely solely on a thermal camera for spotting and observation might be disappointed. It’s an addition – not a replacement for other tools.
Useful alternatives or additions:
Binoculars or Spotting Scope
- If you want not only to spot but also identify animals, you’ll still need binoculars, a spotting scope, or a camera with a telephoto lens.
- Especially for daytime use, a high-quality pair of binoculars is often a better investment than an entry-level thermal camera.
Bright Binoculars for Low Light
- Particularly useful at dawn or dusk to spot animals without thermal support.
- Provide better detail than entry-level thermal cameras.
Thermal Camera as an Add-On
- Ideal for night use, when optical tools reach their limits.
- A perfect complement for photographers who want to analyze animals and their environment before shooting.
FAQ – Frequently Asked Questions About Thermal Imaging Cameras in Wildlife Photography
1. Is a thermal imaging camera suitable for beginners in wildlife photography?
Yes and no – as long as you use it as a complementary tool for spotting. As a beginner in wildlife photography, you should focus primarily on the photography itself first.
2. Can you take high-quality photos with thermal cameras?
Only to a limited extent. The resolution usually isn’t high enough for top-quality photo or video recordings – though this depends on the model.
3. How useful is the camera in daylight?
In shaded forest areas, it can still be effective – but in direct midday sun or generally warm environments, it becomes much more challenging.
4. What’s the benefit of combining a thermal camera with a photo setup in wildlife photography?
By using both technologies together, you can enhance location scouting and spot animals even in very low light. It also makes the nature experience more intense and rewarding.
5. Which animals can be spotted well with the HIKMICRO LYNX LH19 2.0?
It depends on the distance. The LYNX LH19 2.0 works best at medium range, around 250 m. The maximum detection range is 900 m. Mammals from fox size upwards can still be recognized. With songbirds it’s more challenging – especially the farther away they are. Birds in flight, whether small songbirds or eagles, can usually be spotted well.
6. Is the HIKMICRO LYNX LH19 2.0 an entry-level thermal camera?
Yes – but that doesn’t mean it delivers poor results. As long as you don’t expect high-resolution images or videos, it’s a solid tool for wildlife observation and spotting. For more performance, you’d need to look into high-end devices.