

Using the Right Shooting Angle for Impressive Wildlife Photos
Learn how to make your wildlife photos more vivid and expressive by choosing the right perspective – including practical tips and common mistakes to avoid…
Follow & share WildeNatur:

Why the Shooting Angle Matters
The angle you choose to photograph from has a major impact on how your image is perceived. It can create a sense of closeness, enhance emotion, or make your subject appear distant and weak. Especially in wildlife photography, the right perspective often makes the difference between wow and meh.
How to Use Angles Effectively
1. Shoot at Eye Level
An image taken at eye level feels more natural and intimate – almost as if you're looking the animal straight in the eye.
Tip:
Crouch down or lie flat on the ground. This is especially worthwhile for small animals – and the background often appears softer and calmer due to the increased distance behind the subject.
2. Low Angle for More Presence
When you shoot from below, the animal appears larger and more dignified.
Example:
A deer photographed from ground level is more likely to look like the king of the forest than one captured from above.
3. Slightly from Above – When It Makes Sense
Sometimes the animal is lying on the ground, but a low angle isn’t possible due to tall vegetation. Or the background may be blown out, and the contrast between green grass and a bright white or grey sky makes the image look chaotic. In these cases, a slightly elevated angle can be the better choice.
4. Choose Your Perspective Intentionally
- Side view: Great for showing motion, posture, or stride
- Frontal: Direct and intense – perfect for emotional portraits
- Diagonal: Adds spatial depth and visual tension to the image
Common Mistakes – and How to Avoid Them
1. Shooting from Above (Unintentionally)
This creates distance and makes the animal appear small and insignificant – especially in the case of smaller species.
2. Distracting Backgrounds
Fences, branches, or people in the background can ruin the atmosphere. Often, one step to the side is all it takes to save the shot.
3. Uncontrolled Backlighting
Backlight can be atmospheric – but only if you manage it well. Otherwise, you’ll get harsh shadows or blown-out highlights with no detail.
In a Nutshell: The Shooting Angle Is Your Creative Tool
A great wildlife photo is rarely just luck – it's usually the result of an intentional choice of perspective. Use angles to create closeness, emotion, and depth. Even small changes in your position can have a big impact on the final image.
These Photo Tip of the Week might also interest you:

Burst Mode in Wildlife Photography – Capture the Perfect Moment
Wild animals move unpredictably. Learn why burst mode can boost your success rate in wildlife photography and offer more creative possibilities…
Follow & share WildeNatur:
Why Use Burst Mode in Wildlife Photography?
1. Capture Unpredictable Movements
Animals react spontaneously: a bird suddenly takes off, a deer lifts its head, or a fox yawns for just a moment. Shooting in burst mode helps you capture these fleeting moments.
2. Make the Most of Crucial Seconds
Sometimes you only get one chance. Burst mode lets you make the most of that short window – delivering an entire sequence instead of a single shot that may not turn out well.
3. Choose the Best Frame
Later, you can pick the shot with the best pose, sharpest focus, and ideal direction – without having to press the shutter multiple times manually.
4. Helps with Autofocus Issues
Even with animal eye AF, not every shot will be perfect. In a burst sequence, your chances are much higher that at least one frame is tack-sharp.
5. Supports Creative Image Selection
A burst sequence is perfect for:
- Action series, like a bird taking off
- Storyboard-style collages
- Choosing the most expressive moment
Remember
Burst mode improves your keeper rate, expands your creative options, and ensures you don’t miss out on those brief, unpredictable moments.
These Photo Tip of the Week might also interest you:

Always Take Your Camera – Never Miss a Photo Opportunity Again
Some of the best photo moments happen unexpectedly. Here's why you should always have your camera with you – and how this helps you avoid classic photography mistakes…
Follow & share WildeNatur:
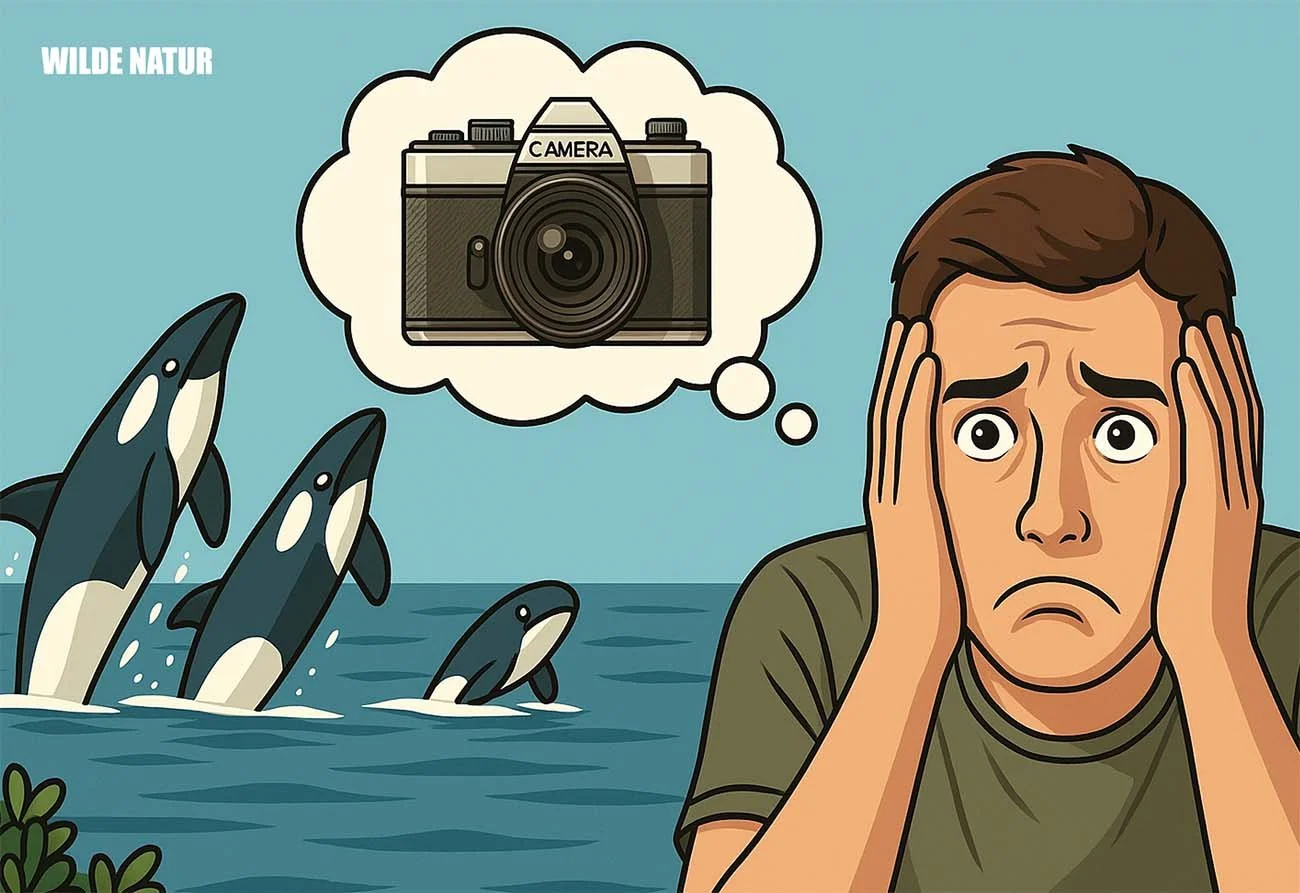
Some of the best photo moments happen unexpectedly. Here's why you should always have your camera with you – and how this helps you avoid classic photography mistakes.
Always Have Your Camera with You
No matter where you're going – take your camera along. Whether it's a city trip, a hike, or just a short outing: it's often that one time you leave the camera behind that a perfect photo opportunity appears – one you may never get again.
It doesn't matter whether you have a telephoto lens, an ultra-wide, or just a standard lens mounted. The main thing is: your camera is ready when you need it.
Why This Matters
- Many subjects are once-in-a-lifetime moments – they won't come back.
- Especially when traveling or hiking, missing the perfect shot can be extra frustrating.
- It’s one of the classic photographer mistakes: the camera stays in the hotel while the perfect scene appears outside.
Remember
If you regularly carry your camera, you'll develop an eye for potential subjects – and you'll stop missing great shots. Better to carry it for nothing than to be unprepared when it counts.
These Photo Tip of the Week might also interest you:

How to Spot Subjects Faster Through the Viewfinder
Wasting valuable seconds trying to find your subject? Learn 7 simple techniques to help you spot and track subjects faster – ideal for action, wildlife, or fast-paced scenes…
Follow & share WildeNatur:
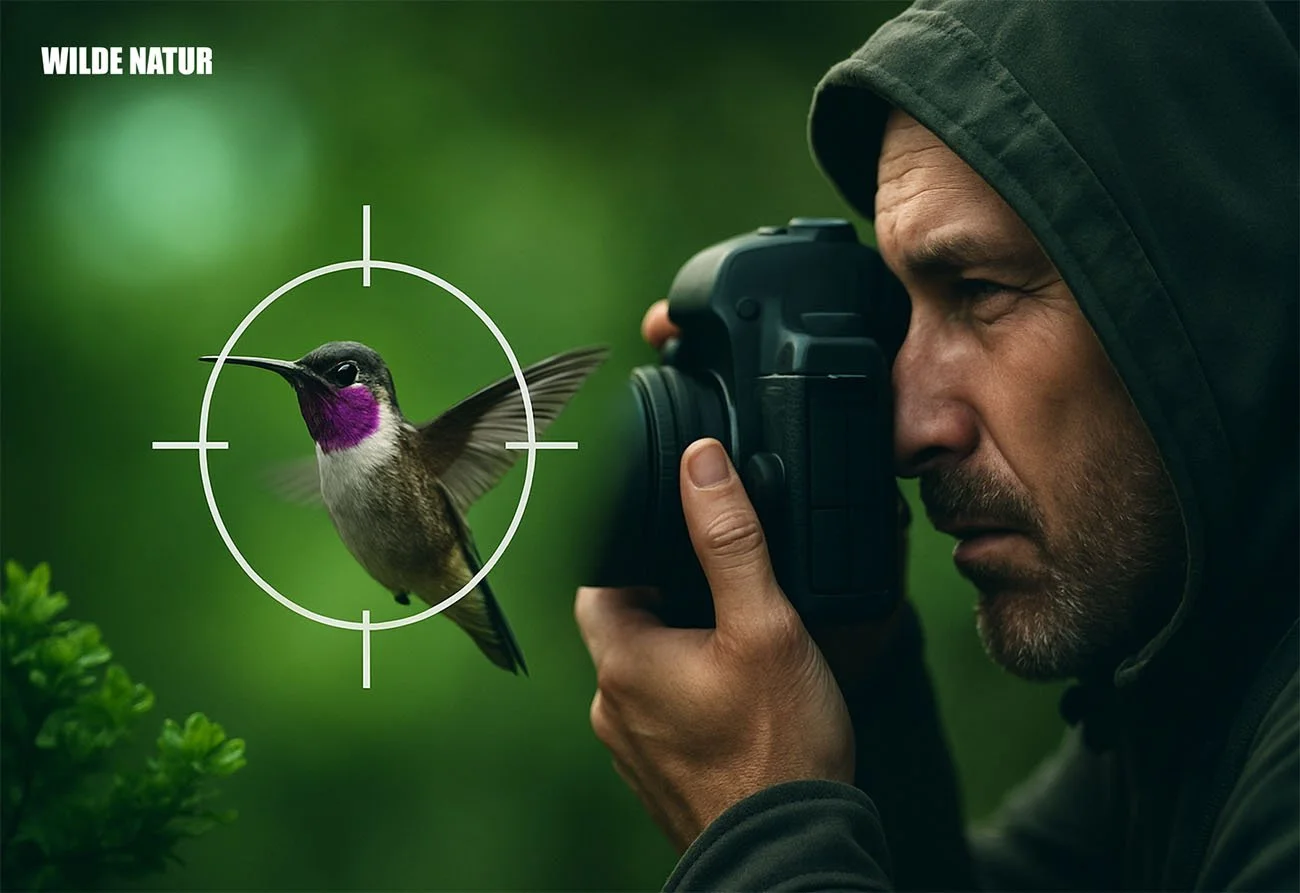
Wasting valuable seconds trying to find your subject? Learn 7 simple techniques to help you spot and track subjects faster – ideal for action, wildlife, or fast-paced scenes.
Step 1: Keep Both Eyes Open
When looking through the viewfinder, keep your other eye open. This helps you follow movement more effectively and spot your subject faster – even outside the viewfinder frame.
Step 2: Point the Camera in the Expected Direction
Turn your upper body toward where you expect the subject to appear and aim the camera accordingly. This improves your orientation and shortens the time it takes to lock on.
Step 3: Start Wide – Then Zoom In
If you're using a zoom lens, begin with a shorter focal length (e.g., 100 mm instead of 400 mm). It’s easier to locate your subject with a wider field of view. Once you’ve found it, zoom in for the shot.
Step 4: Observe Movement Patterns
Carefully watch your subject's behavior. Anticipating movement allows you to pan in advance and keep the subject framed and focused more easily.
Step 5: Smooth Viewfinder Panning
Avoid frantic searching. Pan smoothly with your subject. This technique – known as "panning" – is especially useful for fast-moving action.
Step 6: Memorize Key Locations
Learn where animals typically appear or which paths they follow. Aim the viewfinder at these spots ahead of time – especially helpful when shooting with a tripod.
Step 7: Birds in Flight – Track with Your Eyes
Follow flying birds first with your eyes. Then bring the camera to your eye without breaking visual contact. With some practice, you’ll instantly get the bird into your viewfinder – perfect for quick reaction shots.
Remember
These techniques save precious seconds and help you capture more moments – especially during fast wildlife encounters or action scenes. The better you know your gear, the more you can focus on the scene itself – without scrambling to find the subject in your viewfinder.
These Photo Tip of the Week might also interest you:

RGB Histogram – Avoid Color Clipping and Exposure Errors
The RGB histogram shows the exposure of each color channel. Avoid color clipping and overexposed details in colorful scenes – with this practical tip…
Follow & share WildeNatur:
The RGB histogram shows the exposure of each color channel. Avoid color clipping and overexposed details in colorful scenes – with this practical tip.
Using the RGB Histogram for Color and Exposure Control
The classic histogram only shows brightness – and that's often not enough for colorful subjects. The RGB histogram goes a step further: It analyzes the red, green, and blue color channels individually and shows you where things get critical.
Why It Matters
In scenes like sunsets, flowers, or colorful fabrics, a single color channel can be overexposed, even if the overall image looks okay. The result: Color clipping, flat tones, and lost detail in bright areas.
What the RGB Histogram Shows
- Three separate curves for red, green, and blue
- Each curve shows the brightness distribution of that color channel
- Far right: overexposed channel → detail lost
- Far left: underexposed channel → no color info in the shadows
What to Avoid
- Channel clipping: If a curve is cut off on the right, color detail is lost – for example, in bright reds or sunlit skin tones
- Color banding: Reduced color depth makes even strong subjects look flat and lifeless
Practical Tip: Activate the RGB Histogram
Set your camera to display the RGB histogram when reviewing images in the viewfinder or on the screen. This allows you to fine-tune exposure and prevent the loss of important visual information.
In a Nutshell
The RGB histogram is your early warning system for colorful subjects. It helps you detect overexposure in individual channels and preserve the full color depth of your images.
These Photo Tip of the Week might also interest you:

Judge Exposure Accurately – How to Use the Histogram Correctly
Don’t rely on your display. With the histogram, you can immediately see whether your image is over- or underexposed – objectively and reliably…
Follow & share WildeNatur:

Histogram Instead of Guesswork
The camera display or viewfinder can be misleading – in sunlight, an image often appears too dark, and in the shade, too bright. The histogram, on the other hand, objectively shows how brightness is distributed in the image:
Left = Shadows, Middle = Midtones, Right = Highlights.
A strong peak at the edges indicates lost image information – especially overexposed areas are hard to recover.
Remember:
- Use the live histogram in the viewfinder or display if available.
- On older cameras: take a test shot, check the histogram, and adjust exposure.
- The goal isn’t a “perfect” histogram, but an intentional use of light distribution.
The histogram is your most important tool for precise exposure – not just in challenging lighting conditions.
These Photo Tip of the Week might also interest you:

Shooting in Bad Weather – How to Use Rain, Fog, and Snow Creatively
Bad weather doesn't mean you have to stop shooting. Discover how to capture unique photos in rain, fog, or snow – with tips on light, mood, and technique…
Follow & share WildeNatur:

Bad weather doesn't mean you have to stop shooting. Discover how to capture unique photos in rain, fog, or snow – with tips on light, mood, and technique.
Shooting in Bad Weather – Your Chance for Unique Photos
Rain, fog, or snow often seem like reasons to stay inside – but they actually offer opportunities for atmospheric and one-of-a-kind images. These conditions create special light, unexpected perspectives, and strong emotional tones. Wildlife can also become more active, especially right after a weather change.
Why Bad Weather Is Good for Your Photos
- Soft Light Instead of Harsh Shadows: Clouds and fog act like natural diffusers, creating even lighting – perfect for detail and smooth brightness transitions.
- More Depth and Atmosphere:
- Fog adds a mysterious, almost fairy-tale-like mood.
- Rain brings motion, shine, and reflections into the frame.
- Snow mutes color, emphasizes shapes, and allows for minimalist compositions.
- Strong Emotions: Weather becomes part of the mood – from mystical to peaceful.
- Fresh Perspectives: Familiar places suddenly look unfamiliar and reveal scenes hidden in sunny weather.
- Creative Challenge: Difficult conditions force you to make more deliberate choices – often leading to better results.
- Wildlife Activity: Many animals are more active after rain – thanks to new smells, cooler air, or the search for food. Birds in particular can be easier to spot and photograph.
Tip: What to Keep in Mind
- Protect Your Gear: Even a simple plastic bag or rain cover helps keep moisture out. Even better: a weather-sealed housing or an umbrella mount on your tripod.
- Adjust Exposure Manually: Diffuse light often works well with auto settings, but fine-tuning exposure (+/- compensation) helps manage contrast intentionally.
- Use a Tripod: In low light conditions, a good old tripod still helps prevent blurry shots.
In a Nutshell
Bad weather isn't an obstacle – it's a stage for exceptional images. With the right preparation, an alert eye, and a bit of courage, you can capture scenes that are nearly impossible to find on sunny days.
These Photo Tip of the Week might also interest you:

Less Is More – How to Be More Creative with Minimal Gear
Shoot more intentionally with minimal equipment. Learn why less gear often means more focus, creativity, and better photos – with practical tips for shooting on the go…
Follow & share WildeNatur:

Do More with Less – Shooting with Minimal Gear
Less gear, more creativity: When you limit yourself to the essentials – one camera, one lens, and a spare battery – your attention shifts away from equipment and toward image-making with light, perspective, and subject.
Why Less Gear Can Lead to More
- Fewer Distractions: Working with what you have helps you make more intentional creative choices.
- Focus on the Essentials: Light, composition, and perspective take priority over switching lenses.
- More Flexibility on the Go: A light setup is perfect for spontaneous moments, especially while traveling or location scouting.
- Creative Challenges: Sticking with one camera-lens combo – ideally a prime lens – pushes you to explore position and framing. Even a smartphone can work.
- Deeper Understanding of Your Tools: Using less teaches you what your gear can (and can't) do – and which techniques can help you get the most out of it.
The Power of a Minimal Setup
A reduced kit brings clarity, flexibility, and creativity back into your photography. Especially during creative ruts, focusing on the basics can help you rediscover new ideas and fresh perspectives.
These Photo Tip of the Week might also interest you:

AF Subject Detection – How to Get Sharp Images of Any Subject
Learn how your camera’s AF subject detection works, when it’s most useful for tack-sharp photos of people, animals, and more. …
Follow & share WildeNatur:

What Is AF Subject Detection?
AF subject detection is a feature found in many modern digital cameras, especially mirrorless models. “AF” stands for autofocus. The camera automatically detects specific subjects like faces, eyes, animals, or vehicles and focuses directly on them.
What Does AF Subject Detection Do?
- The camera analyzes the live view in the viewfinder or on the screen.
- It detects whether people, animals, or vehicles are in the frame.
- It automatically selects the appropriate focus point – usually the eye or face.
- Depending on the model, you can choose between human, animal, or vehicle detection.
What Is AF Subject Detection Good For?
- Sharp Images: The focus stays locked on the eye, even with moving subjects like children, pets, or birds.
- More Hits: Your number of sharp shots with accurate focus increases significantly.
- Ease of Use: Great for beginners – you don’t need to set the focus point manually.
Advantages
- Perfect for wildlife photography
- Lets you focus more on composition – the camera assists with focus point selection
- Especially effective with fast-moving subjects like flying birds
Disadvantages
- If you want to choose the focus point manually instead of letting the camera decide, you should turn off subject detection.
These Photo Tip of the Week might also interest you:

Use the right AF mode – be ready for the action!
If your subject is moving – like animals, people, or vehicles – you need continuous autofocus this mode continuously adjusts the focus while you…
Follow & share WildeNatur:
AF Mode – For Moving Subjects: Activate AF-C
If your subject is moving – like animals, people, or vehicles – you need continuous autofocus (AF-C for Sony and Nikon, AI Servo for Canon). This mode continuously adjusts the focus while you half-press the shutter button or use back-button focus. That way, your subject stays sharp even while in motion.
What You Should Avoid
In static mode (AF-S or One-Shot), the focus is locked once and stays on a fixed point. As soon as your subject moves, it will go out of focus – resulting in blurry images. You would have to keep refocusing manually. Let the camera handle that – it does a better job.
The Advantages of AF-C at a Glance
- Sharp images of moving subjects – perfect for action shots in wildlife photography or video.
- The focus actively tracks your subject, even during sudden direction changes.
- Many cameras offer subject recognition: they detect the main subject, like an animal or vehicle, and help keep it in focus.
Remember: For anything that moves, continuous autofocus (AF-C) is essential. It helps you capture motion, speed, and the decisive moment with confidence.
These Photo Tip of the Week might also interest you:

Guidelines for Shutter Speeds in Photography
The right shutter speed is crucial for either freezing motion or intentionally capturing movement. Here are some proven…
Follow & share WildeNatur:

The right shutter speed is crucial for either freezing motion or intentionally capturing movement. Here are some proven reference values:
Sharp Images of Moving Subjects
- 1/1000s: Running animals or slow-flying birds.
- 1/2000s – 1/4000s: Fast-moving subjects like birds in flight.
Panning Shots (Intentional Motion Blur)
- 1/80s: For dynamic effects in fast-moving subjects, such as birds in flight.
Long Exposure for Creative Effects
- 6 seconds: To create a soft, flowing water effect.
Shake-Free Shots – An Old Rule of Thumb
This guideline dates back to the film era but still serves as a useful reference:
- 1/Focal Length: Use at least the reciprocal of the focal length (e.g., 1/400s for a 400mm lens).
- High-Resolution Cameras: Use even shorter shutter speeds, as high-megapixel sensors amplify motion blur.
These values serve as a general guide and should be adjusted based on your subject and lighting conditions!
These Photo Tip of the Week might also interest you:

Quick Tip: Minimalism in Wildlife Photography
Wildlife photography isn’t just about close-ups. A minimalist approach can create equally striking images…
Follow & share WildeNatur:

Wildlife photography isn’t just about close-ups. A minimalist approach can create equally striking images—sometimes, less is more.
- Clean background: A simple backdrop keeps the focus on the animal.
- Wide aperture: Use f/2.8 or f/5.6 for a beautifully blurred background.
- Simple composition: Utilize negative space to let the subject stand out.
Tip: Remove visual distractions and keep your composition intentionally simple—this enhances the impact of your photo!
These Photo Tip of the Week might also interest you:

Photo Tip: Achieve More Precise Focus with Back-Button Focus
Normally, focus is set by half-pressing the shutter button. With Back-Button Focus, you control it using a…
Follow & share WildeNatur:

Normally, focus is set by half-pressing the shutter button. With Back-Button Focus, you control it using a separate button on the back of your camera.
- The focus stays locked on the subject, even if you release the shutter.
- Ideal for fast-moving subjects like birds in flight.
- Prevents the camera from refocusing every time you press the shutter.
Tip: Enable this feature in your camera settings and practice with moving subjects. A key advantage: You can assign two different focus areas to separate buttons—such as a wide field and a spot focus—allowing quick adjustments without navigating through menus.
These Photo Tip of the Week might also interest you:

Panning – Capturing Motion Dynamically
A panning shot is a photography technique where you move your camera in sync with a moving subject while taking…
Follow & share WildeNatur:

A panning shot is a photography technique where you move your camera in sync with a moving subject while taking the photo. This keeps the subject sharp while blurring the background, creating a strong sense of speed and motion.
How to Master the Perfect Panning Shot:
- Slow down your shutter speed (around 1/30s – 1/125s, depending on the subject's speed).
- Track the subject through the viewfinder and move the camera smoothly with it.
- Keep focus on the subject and press the shutter while in motion to achieve the background blur effect.
- Use burst mode to increase your chances of getting the best shot.
Tip: If you don’t have birds nearby, practice the panning technique with cyclists or cars. The smoother your movement, the better the effect!
These Photo Tip of the Week might also interest you:

Moon and Birds in the Evening Sky: Magical Photography Moments
Shortly after sunset, when the moon rises, a unique opportunity arises for…
Follow & share WildeNatur:

Shortly after sunset, when the moon rises, a unique opportunity arises for stunning shots. Birds in flight silhouetted against the moon or with it in the background create a truly atmospheric scene.
During the autumn crane migration, in particular, you can capture breathtaking and evocative images. Take advantage of this brief time window to create extraordinary nature photographs.
These Photo Tip of the Week might also interest you:

Quick Tip: Better Bird Portraits with a Clean Background
A distracting background can ruin an otherwise great bird portrait. Many photographers focus solely on…
Follow & share WildeNatur:

A distracting background can ruin an otherwise great bird portrait. Many photographers focus solely on the bird and overlook branches or other visual clutter.
Pay close attention to the background before you press the shutter. Choose a simple, uncluttered setting or use a wide aperture (e.g., f/4 – f/5.6) to create a soft bokeh effect. This helps the bird stand out beautifully.
These Photo Tip of the Week might also interest you:

Photo Tip: Capturing Magical Moments in Backlight
Not only the late autumn offers ideal conditions for atmospheric shots. Get up early and shoot at dawn against the low-standing sun. The warm, golden light…
Follow & share WildeNatur:

Not only the late autumn offers ideal conditions for atmospheric shots.
Get up early and shoot at dawn against the low-standing sun. The warm, golden light highlights the silhouettes of birds and other wildlife, adding a unique sense of depth and motion to your images.
Backlighting can create stunning effects like misty veils and striking silhouettes—perfect for capturing the beauty of nature in a dramatic way.
These Photo Tip of the Week might also interest you:

Pohtiolampi – Europe’s Top Spot for Osprey Photography
Pohtiolampi in Kangasala, Finland, is one of the best places in Europe to photograph ospreys. Many of the most famous…
Follow & share WildeNatur:

Photo was taken in Bavaria and is exemplary
Pohtiolampi in Kangasala, Finland, is one of the best places in the world to photograph ospreys. Many of the most famous nature magazine images originate from here.
- Up to 150 dives per day – perfect for action shots.
- Photography hides & an osprey tower provide ideal vantage points.
- Best time to visit: Spring and summer.
- Reservations: Via sääksisäätiö.fi.
A must-visit destination for wildlife photographers!
These Photo Tip of the Week might also interest you:

Photography Starts with Understanding Your Gear and Techniques
Your camera, lenses, and accessories are merely tools—the better you understand and master them, the more effectively you can bring your…
Follow & share WildeNatur:

Your camera, lenses, and accessories are merely tools—the better you understand and master them, the more effectively you can bring your creative ideas to life. Just like a skilled craftsman uses tools with precision, you should be able to handle your equipment with confidence.
- Use What You Have: Great photos don’t come from expensive high-end gear but from skillful use of light, composition, and technique.
- Equipment is Secondary: Even with basic cameras and lenses, you can capture stunning images—knowledge and creativity matter most.
- Focus on Techniques and Settings: Instead of chasing the latest camera models, invest time in understanding focal lengths, exposure, and composition.
- Technology Evolves – Fundamentals Stay the Same: Cameras change frequently, but the principles of photography remain timeless.
Learn to make the most of your current equipment, and your photography will naturally improve. Even the most expensive camera is useless without knowledge and creativity.
These Photo Tip of the Week might also interest you:

Photography Tip: The Power of Negative Space
Negative Space means deliberately leaving empty areas in…
Follow & share WildeNatur:

The area marked in red is called negative space in photography

More impact with less: negative space can improve your photo!
Negative space refers to intentionally using empty areas in your image to surround and highlight the main subject.
- Directs the viewer’s focus to the key element.
- Creates a calm, minimalist composition.
- Enhances storytelling by simplifying the scene.
Tip: Simple backgrounds like the sky, water, or a plain wall help emphasize your subject. Less is often more!